Monday, December 31, 2012

January is National Oatmeal Month!

I have no idea how or when this came about, but, if you're going to have National Oatmeal Month, I think January is a good time for it. Oatmeal is hearty and healthy--good qualities for winter and January resolutions.

I've never baked oatmeal bread before, so I think this is a good way to observe NOM.

Right now I can smell the fruits of my first effort. The bread in the oven smells like oatmeal cookie goodness.

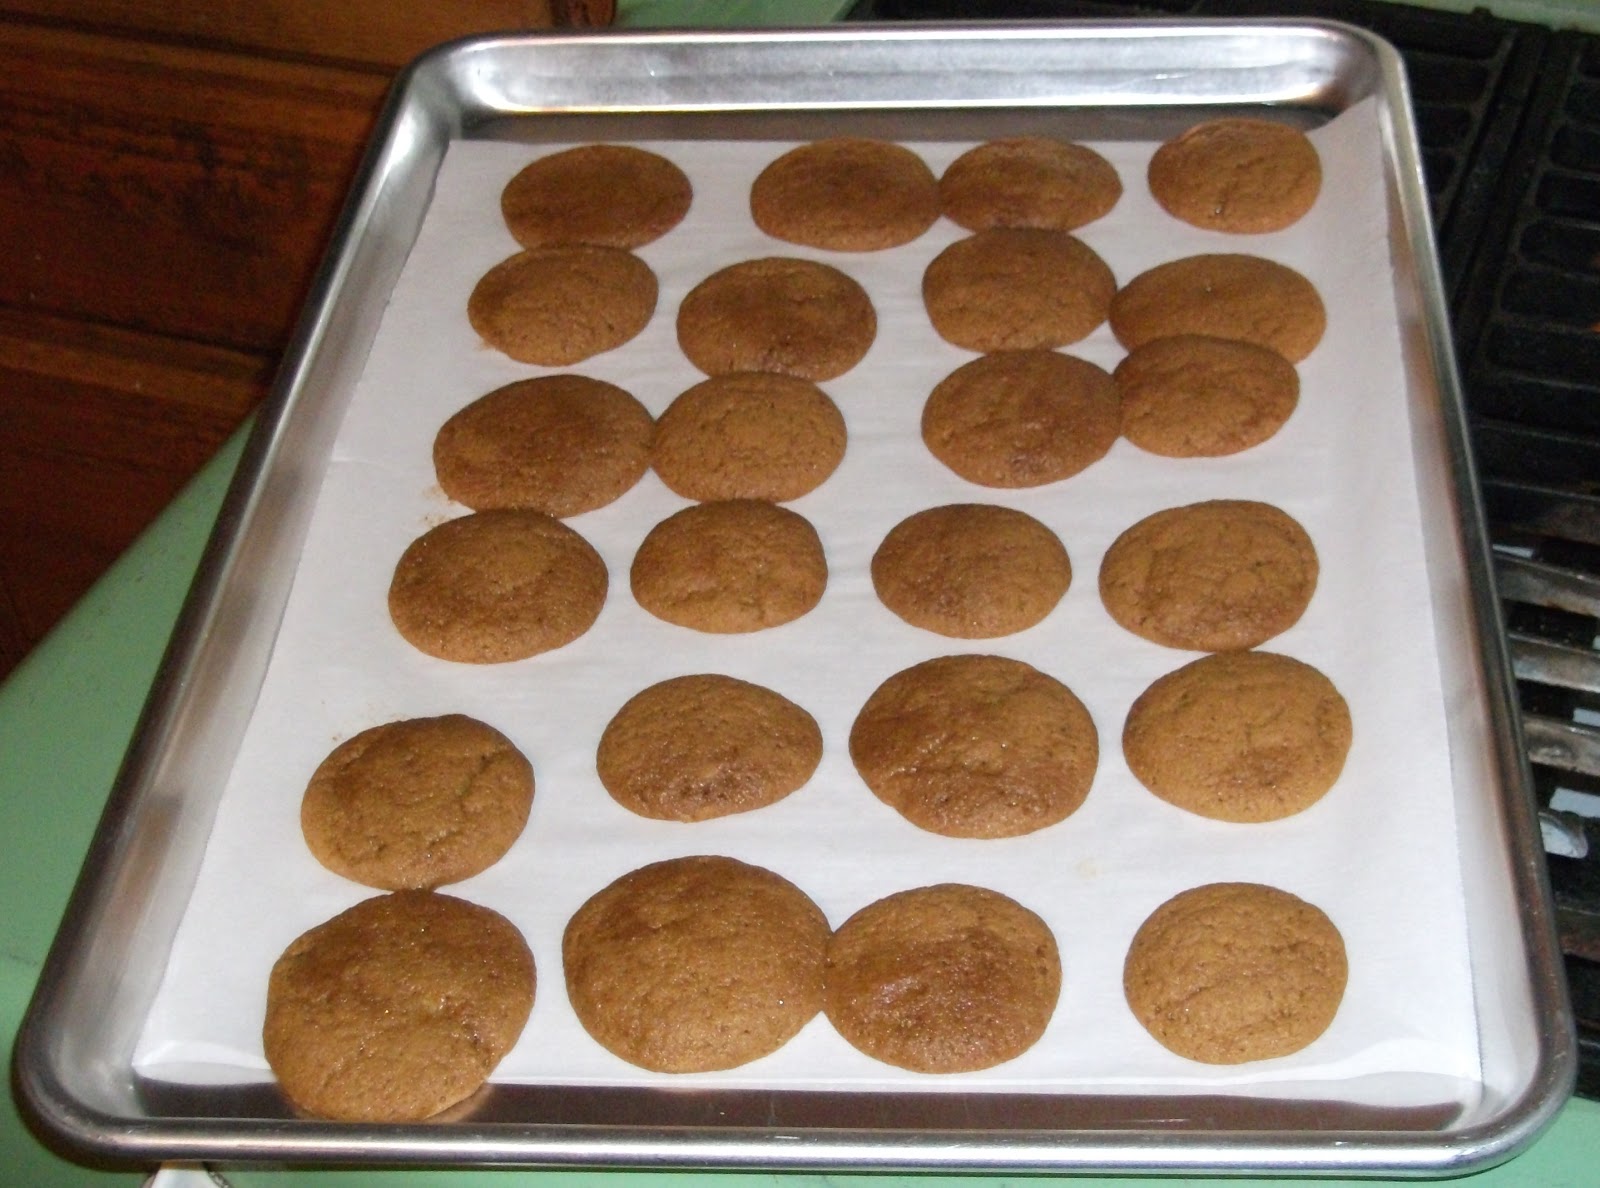
Now out of the oven, here's what the bread looks like:


I am trying to wait for it to cool a bit before tasting it.

This recipe is from a bread book that my friends Velma and Len Dippold gave me. The recipes in Uncle John's Original Bread Book were collected by John Braue's family for generations. His father was a master bread baker in Hamburg before coming to this country in the late nineteenth century. It's been a long time since I've had a recipe book this fun to read!

The recipe is called Grossmutter's Golden-Sunrise Wheat or Oatmeal Brot. Obviously, I'm going with the oatmeal option.

I love my new book holder!

I sliced the bread:


It's slightly coarse, chewy, and, with just a hint of oatmeal, more flavorful than white bread. Delicious!

I also baked a whole wheat version. It smelled just as oatmeal-heavenly while baking.


I sliced it:


It's also slightly coarse, chewy, and, with just a hint of oatmeal, has a more complex flavor than regular whole wheat bread. Delicious!

Here's the recipe with my tweaks, because I don't use shortening in bread, I use instant dry yeast, I have dry milk (and water!) but not fresh milk, I'm using loaf pans instead of making round loaves, I know my oven, and I'm just interested in the oatmeal option:

Grossmutter's Golden-Sunrise Oatmeal Brot

Mix together:
2 1/4 C warm water
1/4 C honey
2 T canola oil

Mix together and beat into above mixture until smooth:
2 C (8.5 oz.) all-purpose flour*
1 1/2 T instant dry yeast
1 T salt
2/3 C instant nonfat dry milk

Add:
2 C (6.25 oz.) quick-cooking rolled oats

Add and stir well:
2 C (8.5) C all-purpose flour* [According to the recipe, you shouldn't need the full amount, but that was not my experience.]

Turn the dough out onto a floured surface and knead, adding flour as needed, until elastically smooth. Then return to oiled bowl, turning the dough to oil all surfaces; cover.

Let rise in a warm place until doubled in size. Punch down and form into loaves. Let rise about 45 minutes. Bake at 375 degrees for about 35-40 minutes.

*Or use whole wheat flour (from hard red wheat)

Sunday, December 30, 2012

Fusion Pizza

I'm not trying to be trendy. This pizza developed from a love of buffalo chicken and a need for lower calorie pizza crust.

My daughter shared with me this great recipe for Buffalo Chicken:

Crockpot Buffalo Chicken

3 lbs frozen (or fresh) chicken breasts
1 bottle Franks buffalo sauce
1 packet of ranch seasoning (Hidden Valley)

Throw it all in the crockpot on low for 6-7 hours. Then shred the chicken, then cook for another hour in the crockpot to soak up juices. Then eat and enjoy!!
It is so good! I've used up to double the amount of chicken called for with excellent results. Also, I don't have a crockpot, so I put everything in a Dutch oven, put it in the oven at 350 degrees for 30 minutes and then turn down the heat to the lowest setting, cook it for 3 or so hours, shred the chicken, and then return it to the oven for another hour. So easy!

I'm sure you can imagine lots of ways to use it. Quesadillas come to mind. But my favorite way to use it is on pizza.

You can use regular pizza dough. If you want to lighten things up, try using flour tortillas. These days I use the flour of hard white wheat for tortillas.

I discovered I can bake my tortillas on my pizza stone!
Here I'm using my new pizza peel to set the tortilla onto my new pizza stone. (Go here and scroll down to see my old pizza stone.)
The baked tortilla is ready to come out. I find this an easier way to bake them than on top of the stove, pizza or not. Either way is pretty easy, though!

And, yes, I've already managed to stain my pizza stone. The tortilla is so thin that the toppings weigh it down too much to slide off of the peel. That's how I learned to use parchment paper under the tortillas. By the way, you can put toppings on tortillas unbaked or baked. Since I wasn't making pizza with all of the tortillas, I just found it easier to pre-bake the tortillas today. Then I put the leftover ones in a gallon-size ziploc bag and put them in the refrigerator for another day.

Now for the pizza topping:
Mix together 2 parts ranch dressing and 1 part Frank's Red Hot Original Cayenne Pepper Sauce. I use light ranch dressing, or part fat-free. Some people use blue cheese dressing. Spread it thinly on the tortilla (or pizza dough).
Layer Crockpot Buffalo Chicken on top.
Sprinkle shredded mozzarella cheese, and perhaps a bit of shredded Parmesan cheese, on top.
Variations: Before adding the cheese, top with some cooked broccoli and/or sautéed onions and peppers.
 Baked to perfection!
 It's ready to be eaten!


Friday, December 28, 2012

The Quest: Whole-Grain Cracked Wheat Bread

Cracked Wheat Bread--the favorite bread of many.

It is good bread: soft and springy with the chewy nuttiness of the cracked wheat; salty, and sweet with molasses.

It contains whole grain: freshly-cracked wheat berries.

But the flour is white flour: high quality flour--King Arthur bread flour--unbleached and unbromated. But lacking the nutritious bran and wheat germ of whole-grain flour.

Could I use whole-grain flour and maintain the distinctive taste and texture?

Today I am using flour freshly-ground from hard white wheat. This flour is milder than "regular" red wheat flour.


It is good bread: soft and springy with the chewy nuttiness of the cracked wheat; salty, and sweet with molasses.

The whole-grain flour adds some welcome complexity to the flavor. And the nutrition of whole grain.

I prefer this version of cracked wheat bread.

What about you?

Aunt Betty's Cracked Wheat Bread

Pour 4 C boiling water over 2 C (8.5 oz.) cracked wheat and stir. Let stand until most of the water is soaked up, but not dry.

Add:
C molasses
½ C plus 2 Tbsp. canola oil

Stir together and add, mixing with the dough hook of an electric mixer if you have it:
1 lb. flour (about 3½-4 C)--white bread flour or hard white whole-wheat flour
½ C sugar
2 Tbsp. yeast
1 C instant powdered milk
2 Tbsp. salt

Add and mix:
2 eggs
1¼ lbs. flour (about 4-4½ C)--white bread flour or hard white whole-wheat flour

Pour the dough onto a floured counter and knead it, adding more flour as needed, 1-2 C, until dough is smooth and elastic.

Place dough in an oiled bowl; cover with waxed paper. Let rise once. Measure and shape into 4 or 5 loaves. Let rise and bake at 350°F for about 40 minutes.

Saturday, December 22, 2012

Ginger Snaps

After making gingerbread houses and then gingerbread cake, it seemed only right to bake one of my favorite cookies: Ginger Snaps.

I found this recipe many years ago in my Joy of Cooking. My college roommate and friend, Lani King, gave that cookbook to me for my birthday in 1974. That cookbook has been one of a handful that I have kept at hand through the years. 15 years ago my family gave me the updated edition of Joy of Cooking. But I just never felt comfortable with it. For interest's sake, I pulled it out to see if it had my beloved ginger snap recipe in it. It was definitely based on the recipe from the earlier edition, but the differences were significant: the addition of baking powder, less baking soda, more ginger, more cinnamon, the addition of salt, double the amount of butter, less sugar, lemon juice in place of vinegar, and the addition of lemon or orange zest. What remained the same: flour, cloves, eggs, and molasses. I'll give it a try sometime, but for the moment, I'm going with my tried and true recipe.

I made the dough three days ago and baked some of the cookies then. So today I pulled the rest of the dough out of the refrigerator.


I used a spoon to dig out chunks of dough, which I rolled into balls. I set the balls onto a baking sheet. I used parchment paper to prevent sticking.


I baked them at 350 degrees for about 12 minutes.


Fresh out of the oven, they are a little puffy and very soft. You will see signs of the characteristic crinkling. Wait a couple of minutes for them to firm up before transferring them to cooling racks.


When they are cool, they are crinkly, and firm but chewy.

Several years ago, before I discovered white wheat, I tried making these using red whole wheat flour. I didn't like the flavor the flour added, so I continued to make them using all-purpose flour. Having recently used flour milled from soft white wheat successfully in other cookie, brownie, and cake recipes, I used some in making these cookies this time. Because I was giving away most of the cookies, I conservatively only replaced 1/4th of the all-purpose flour with the whole wheat flour. They are delicious, and, if anything, I think the texture is improved.

By the way, I don't pretend to think that a little whole wheat flour suddenly makes cookies nutritious. Cookies, by their nature, should always be eaten sparingly. However, any time I can replace refined grains with whole grains, I consider it a benefit.


Ginger Snaps

Cream together:
¾ C butter
2 C sugar

Stir in:
2 eggs
½ C molasses
2 tsp. vinegar

Stir together and add:
3¾ C all-purpose flour (or replace at least 1 C with soft white whole-wheat flour)
1½ tsp. baking soda
3 tsp. ginger
½ tsp. cinnamon
¼ tsp. cloves

Mix ingredients until well-blended. Form dough into small balls. Bake at 350°F on baking sheet lined with parchment paper (or greased), for about 10-15 minutes. Let cookies set for a couple of minutes before transferring to cooling rack.

Yields about 7 dozen cookies.


Wednesday, December 19, 2012

Heritage Honey

Many years ago, we bought a 60 pound container of honey, to use and for food storage. Through the years we have bought and used lots of other honey, but we have used this honey, too, which came to be known as our "heritage honey." One Christmas, Will gave everyone a jar of heritage honey!

When I started baking a lot this fall, Joe and Will gave me the rest of the heritage honey!


It's hard to tell in this photo, but the date is 7-84. As in 28 years ago.
Tonight I cleaned out the last of the heritage honey.


Believe that I licked the spoon. Absolutely delicious!

Monkey Bread--Updated

Monkey Bread, or Pull-Apart Bread, is yet another way of baking my Aunt Betty's awesome roll dough, for which you can find the recipe here. You can use bread dough or even (breathe, Kathy) canned biscuit dough, but I prefer roll dough. This roll dough.

This is a lot of dough, so you might want to cut the recipe down. Today I used half of the dough to bake 2 dozen dinner rolls, and the other half to make 5 small loaves and one regular loaf of Monkey Bread. So, with half of the dough, you can make 8 small loaves or 3 regular loaves. (Don't get too hung up by the proportions here!) I don't have a bundt pan, so I don't know how much that would take.
 
Combine ¾ C sugar and 6 tsp. cinnamon in plastic container or bag. Cut or pinch Sweet Roll Dough into pieces; then shake 10-12 pieces at a time in the cinnamon-sugar mixture. Place the pieces in buttered loaf pans or Bundt pan.
When I made this before, I pinched off the dough into small pieces (about 3/4-1 inch in diameter). That would be fine for one or two loaves. But I was making even more that day than I made today. So it took forever. Today I decided to pat the dough out and cut it with a pizza cutter. That worked much better!

Update: Instead of flouring your counter, smear a little canola oil on the counter and pat the dough out onto it. The cinnamon-sugar sticks to the dough better this way.


Melt butter. Add brown sugar and cook and stir until it begins to boil. Pour mixture of butter and brown sugar over dough in pans. (1 C butter + ½ C brown sugar is enough for ½ batch of dough, yielding 8 small loaves or 3 regular loaves.)

That's a lot of butter! Remember to make this is an occasional treat!
 
Let rise. Bake at 350° for about 15-20 minutes for small pans and longer for regular pans, until browned. Invert onto plate.

If you can, eat this when it is a few minutes out of the oven and still warm.
The. Best.
It's still very good when cold. I have no experience with eating it the next day.

Saturday, December 15, 2012

Fruit Crisp

At a recent family dinner, we were planning to have homemade magic shell, a new favorite topping, with ice cream and frozen fruit for dessert. If you use frozen fruit, it's best to let it thaw slightly. In preparation, I had put mixed frozen fruit--one of those bags of strawberries, blueberries, raspberries, and blackberries--in a serving bowl. Well, we ended up just serving ice cream with the magic shell. So I tried to think of something else to do with the fruit. I thought of cobbler, but I'm not really a cobbler fan. But I love crisps! I decided to modify my Apple Crisp Topping. I simply left out the spices, the cinnamon, nutmeg, and cloves. But berries are a lot juicier than apples, so I decided to prepare the fruit as if I were making cobbler.

Here is the resulting recipe:
Fruit Crisp

In a large, heavy pot, combine:
1/4 C sugar
1 T corn starch

Add:
4 C mixed fruit (such as a bag of frozen strawberries, blueberries, raspberries, and blackberries)

Cook, stirring constantly, until mixture thickens and boils.

Pour into an ungreased 2-quart casserole dish or 9"x13" baking pan.

Top with Apple Crisp Topping, minus the cinnamon, nutmeg, and cloves.

Bake at 400 degrees for 25-30 minutes, until the fruit is boiling and the topping has browned.

Enjoy warm or cold, by itself or with ice cream. Delicious!


Thursday, December 13, 2012

Some Disturbing Nutritional News

Look at the two graphs on Marion Nestle's blog post titled "We eat what we buy. Both need improvement, says USDA." Focusing on grains, for example, we all know we're supposed to eat whole grains. It doesn't need to be 100%, but these graphs show that we, as a society, are way off the mark.

Here are two quotes from the abstract of the study cited by Dr. Nestle:

Overall, consumers purchase too few fruits, vegetables, and whole grains and too many refined grains, fats, and sugars/sweets.

Differences across income levels and across race are small,with all subgroups falling well short of the recommendations in the Dietary Guidelines.

And from "Discussion and Conclusions," page 15:

Virtually without exception among food categories, consumers allocate too much of their food budgets to less healthful options and too little to healthful options. We find that the average household falls far short in fruit and vegetable consumption and spends too much on sugars and refined grains. The correlation between income and purchase healthfulness warrants further research on both the food environment and consumer perceptions, particularly since healthy food options are typically not more expensive (Carlson and Frazao, 2012).

If you do better than this, keep up the good work.

If this describes you, consider making a small change for the better!


Gingerbread: The Cake Kind

My mom made gingerbread lots during the winter. It's one of those recipes for which it is easy to have the ingredients on hand, that comes together quickly, and tastes great.

When I started working on this today, I decided to use the baking pan she used. I was lucky enough to inherit it! As I buttered it, I thought of all the things that had been cooked in that pan: gingerbread, Martha's Chocolate Cake, spice cake, English Toffee, dinner rolls, cinnamon rolls, to name just a few. I also thought of people I connect to it, particularly my mom, my dad, and my sister Margaret. It's a heavy aluminum pan, made by Wearever, from the late 1940's or early 1950's:


My Aunt Betty and Uncle Forest (my mom's brother), who have two of these pans, gave us a pan like this when we got married 33+ years ago. They had to special-order it:


Mine has cooked and baked lots of good things as well, including all of the above. I connect it to my children and my former husband (good memories!).

Here's the gingerbread, fresh out of the oven!

(Oops! Two finger impressions in the center from testing it when it was not quite done. That's what I get for not using a toothpick.)

I modified my mom's recipe a little. I think it's normal that our tastes change and that recipes evolve. In this case, Mom's original recipe is excellent, but I wanted to add the freshness, flavor, and nutrition of freshly-ground whole-wheat flour; to lighten it up a bit by using unsweetened applesauce to replace part of the oil; and to add more spices (nutmeg and cloves) for a more complex flavor.

Gingerbread (Cake)

2 eggs
1 C brown sugar
¾ C oil (or 3/8 C oil and 3/8 C unsweetened applesauce)
¾ C molasses
1 C sour milk
3 C flour (I used soft white whole-wheat flour)
1 tsp. baking soda
¼ tsp. salt
1 tsp. cinnamon
1 tsp. ginger
½ tsp. nutmeg
1 tsp. cloves

Beat eggs until light; add brown sugar. Add oil and molasses. Sift or stir together flour, baking soda, salt, cinnamon, ginger, nutmeg, and cloves. Add dry ingredients alternately with sour milk to the original mixture. Pour into greased and floured 9x13 inch pan. Bake at 350°F for 30- 40 minutes.

Serve topped with whipped cream or applesauce.

Wednesday, December 12, 2012

Gingerbread (Updated)

Update at the end of post!

It's gingerbread time! I don't know how gingerbread, gingerbread men, and gingerbread houses got tied with Christmas, but they are a Christmas tradition in our family.

Part 1: The Dough
Gingerbread

Blend together:
½ C butter, softened
½ C sugar
¼ C molasses
¼ C corn syrup

Add and beat well:
1 egg

Stir together and add:
2½ C all-purpose flour
1 tsp. baking soda
1 tsp. baking powder
1½ tsp. cinnamon
½ tsp. nutmeg
½ tsp. salt
1 tsp. ginger
1 tsp. cloves

You mix the dough and then refrigerate it at least 2 hours. I tripled the recipe because we're going to make 3 gingerbread houses.

You may have noticed that there isn't a trace of whole-grain flour in this recipe. Since this dough is going to be used to make gingerbread houses, I am opting for the strength of the starch in the white all-purpose flour rather than trying to work in any nutrients with whole-grain flour.

Part 2: Rolling Out the Dough

After refrigerating, I divided the dough into 3 parts for easier handling, wrapping each part with plastic wrap. I took each part of the dough out of the refrigerator for about 10 minutes before rolling it out.

First I pushed the dough together to make a ball; then flattened it out somewhat. I floured both sides and then rolled it out on floured wax paper and covered with plastic wrap. I rolled it out to about 1/8th of an inch thickness.

I made a template years ago that I keep in an envelope. There are many online. Here are the dimensions that I used for the gingerbread houses:
2 sides: 4" X 6" rectangles
2 ends: 4" squares, each topped by a triangle that peaks 2" above the center
2 roof pieces: 3-1/2" X 7"  rectangles
chimney:
2 rectangles 3/4" X 1-3/4"
2 rectangles 1-1/2" X 1-3/4", with a triangle cut out of each that peaks in the center 3/4" above the bottoms
Hooray for geometry!

I use my pizza cutter to cut out the pieces. An exacto knife would be helpful, but you can use what you have.

For spaces between the house pieces, and for re-rolled dough, use cookie cutters to cut out little men (and women if you have them), snowmen, angels, Christmas trees, etc., etc. I squish together and re-roll the dough a few times, until I can't stand it any more!


Part 3: Baking the Pieces

Parchment paper is your friend here. So are baking pans that don't warp in the oven. I don't normally use cooking spray for baking, but here I do. I lightly spray the pans so the parchment paper lays flat, and I lightly spray the parchment paper because I don't want the gingerbread to stick.

Bake in a 350-degree oven for 10-15 minutes. Let the pieces cool in the pan for at least a few minutes before transferring them to a cooling rack. First, this helps the pieces to be crisp. Second, if they don't feel crisp enough, you can put them back in the oven for another 10 minutes (since they are cool, they have to heat up again before baking more). This will work. Remember--for gingerbread houses, sturdiness trumps taste. But don't worry, this gingerbread is very tasty, regardless!

Fresh out of the oven.
Lots of gingerbread baked; more to come!
Part 4: Building and Decorating Gingerbread Houses

Baking the gingerbread is my main contribution to the project. At this point, others take over. But first, the Decorator Icing, a.k.a. Royal Icing. This is the glue--quite literally--that holds the house together and sticks the decorations on.
-->
Decorator Icing

Beat together:
2 egg whites, stiffly beaten
2½ C powdered sugar
½ tsp. cream of tartar
tsp. salt
How much you need depends on a number of factors, such as how skilled you are at piping the icing and how much decorating you are doing. By the way, you can use a knife to spread the icing on the pieces to glue them together--that's how we started--but it is much easier to use cake decorating equipment. Even if this is your first time, you can learn on a gingerbread house. It's okay if it isn't perfect. It will still look good. For our three gingerbread houses I quadrupled the recipe.
Tip: It's best to use fresh AA eggs for meringue-type stuff like this.
As I turned to baking pizzas for the hungry masses, Karlyn and Will glued together the houses:
Here's Will. Between my baking pizzas and Karlyn also taking care of her 15 month old, I didn't get a picture of her here. But Karlyn and Will are the experts for this step. They are happy to have others join in, but most of us are happy to let them do this part!
The houses will be ready for decorating after the icing hardens up.
While waiting, children and adults decorated--and ate--gingerbread cookies.
Here are the completed houses!
While it will be fun for the (Joe M.) Downings, the Flansburghs, and the Nguyens to have these gingerbread houses decorate their homes this Christmas season, and it will be fun to eat them (they even taste good stale!), all 21 of us gathered here tonight had a great time! It was worth making gingerbread houses just for that.

Update 1/7/2013: Go here for more photos.

Tuesday, December 11, 2012

Rant Alert!

I love SparkPeople.com. It's a great website for healthy living. I subscribe to their SparkPeople Recipe of the Day, and I've found many great recipes this way. Today's recipe was billed as whole-grain maple cookies. I was interested! Part of the description said " ... it's a great way to incorporate whole grains." It sounded promising! So I clicked on the link to get the full recipe. Now, it is a cookie recipe, so I wasn't surprised to see brown sugar. In fact, I was glad to see maple syrup and honey, too. An egg and some vanilla--good. Then it called for shortening. I wasn't happy about that, because I'm trying to get away from shortening as much as possible, but that's a discussion for another day. Perhaps a pie baking day.

Next came rolled oats or seven grain cereal mix, Bob's Red Mill's mix recommended. Great choices! The next ingredient was all-purpose flour. Why?! This recipe was looking so good! If hard red whole-wheat flour's taste is too strong, why not hard white or soft white whole-wheat flour? Or this recipe looks like oat flour might work.

Of course, I advocate using freshly-ground flour, but those whole-grain wheat flours are readily available in most grocery stores. Locally, Wegmans even sells them under their brand name. You can easily make oat flour from rolled oats in your blender.

So my first complaint is that they could have easily made this recipe really whole-grain. My second--and bigger--complaint is that the recipe is labeled whole-grain and it is not! It contains whole-grains. I see this a lot, where a recipe is labeled as whole-grain and it is only partly whole-grain. I'm not mad at anyone for not using whole-grains or only using them for part of the grain or flour in a recipe. I have plenty of recipes like that. I just ask that they not label them whole-grain if they are not.

Okay. I feel better now.

P.S.--I will save this recipe and try it with different whole-grain flours. I think it will be really good. I'm not sure what to do about the shortening, but I'll investigate the possibilities. If you know of anything, let me know, please!

Monday, December 10, 2012

Coffee Cake and Sticky Buns

Recently I watched the movie "Julie and Julia." In the 70's, I loved watching Julia Child's TV show. Seeing the movie inspired me to reopen her cookbook The Way We Cook. I didn't get past page 50 before I moved to implementation. What's on page 50? A coffee cake ring. So I baked a coffee cake ring. After comparing recipes for the dough, I decided to stick with my recipe (meaning my Aunt Betty's recipe), at least for now, as they are quite similar. I used Julia's filling recipe, which is loaded with raisins and walnuts. After it was baked, I glazed it lightly.

This was my first attempt at baking a coffee cake ring. I never had that many occasions for which to bake sweet breads or rolls, so cinnamon rolls usually worked great. Well, I wish I had read the first part of Julia's recipe more closely, because, as you can see, I had way more dough than I needed!


Regardless of the looks, the taste was amazing! To know me is to know I love chocolate, so when I say that I could eat this instead of chocolate, that's saying a lot.

I decided for the time being to put aside the coffee cake, because, on page 51, was a picture of sticky buns, which used the same amazing filling. Being more closely related to cinnamon rolls, I thought I would be more successful with these.

Again, I used my own dough, Julia's filling, and Julia's sticky syrup, which you are supposed to dribble over the upside down buns after they are baked. Except the sticky syrup was not a syrup. I read and followed the recipe very carefully this time, especially because the syrup recipe looked almost exactly like my recipe for the candy part of English Toffee. The only difference was a little more water. The result was more like the candy part of English Toffee than the syrup she's spooning onto the sticky buns in the picture on page 51.


I decided I needed to try again with some changes: more filling per dough, more space between the buns, and a different syrup or glaze.

After looking at many recipes, I chose a glaze recipe from a sticky bun recipe on the King Arthur Flour website. Here's the delicious result of my (Aunt Betty's) dough, Julia's filling, and King Arthur's glaze:


After filling 3 nine-inch pans, I still had some dough left over. I decided to make a coffee cake, but not a ring. Delicious!


This is very rich stuff, to be reserved for special occasions, but definitely worthy of such occasions.

Sticky Buns
Half recipe of:

Aunt Betty's Sweet Roll Dough
3 C lukewarm water
2 T yeast
1 C sugar or 2/3 C honey
½ C canola oil
½ C instant potato flakes
1 C instant nonfat dry milk (9 T non-instant)
1½ tsp. salt
3 eggs
8-9 C unbleached all-purpose flour, or use soft white whole-wheat flour for 1/3-½ the total flour amount

Dissolve yeast in water in large bowl. Let sit for a few minutes. Add sugar, oil, potato flakes, dry milk, salt, and eggs. Add 3 C of the flour. Beat with mixer until smooth. Kneading by hand or with dough hook, add enough flour to make soft dough (5-6 C). In oiled bowl, let rise once or twice. (For dinner rolls, shape into rolls and place in greased pans; let rise. Bake at 350°F until brown, about 20 minutes.)

Walnut Glazed Rolls
After rising in the bowl, punch down dough. On a floured surface, use your hand to pat the dough (half of it at a time) into a rectangle. Spread prepared filling evenly over the surface.

Filling: (Julia Child, with modifications)
Toss together:
1½ C chopped walnuts
2¼ C raisins
1 C brown sugar (dark) 
1½ tsp. cinnamon
¾ tsp. mace (or nutmeg)
3/16 tsp. salt
1½ T maple syrup (or corn syrup)

Butter 3 9-inch round cake pans. Prepare the glaze and divide it evenly among the pans. Sprinkle ½ C brown sugar atop the glaze in each pan.

Glaze: (King Arthur Flour recipe, with modifications))
Stir together:
¾ C maple syrup (or corn syrup)
4½ T butter, melted

Roll up the dough; cut into 1-inch widths; place onto pans leaving space to rise.Allow dough to stand until double in bulk. Bake at 350° for 20-30 minutes. Remove from oven and invert on serving plates.
(There may be some dough left over. Place the leftover portion of the roll uncut on a buttered baking sheet. Slice as you would for a coffee cake ring and spread out the cut parts, laying them sideways. After baking, glaze lightly, as for cinnamon rolls.)