Watch this. It is amazing on many levels!
I've never eaten Stollen. But, after watching this video, I want to make it. And then eat it.
Monday, November 26, 2012
Sunday, November 25, 2012
On Different Kinds of Wheat, Part 1
Whenever
I read a recipe that includes some variant of a common ingredient, my
eyes glaze over and I usually stop reading it. For example, I was
just reading a recipe for tostadas that uses leftover Thanksgiving
turkey and takes only 15 minutes to make. Everything looked good
until I came to this:
Anaheim
chili
I
don't happen to have an Anaheim chili on hand. Furthermore, I'm not
even sure I could get one at Wegmans. And if I can't get it at
Wegmans, that means I can't get it at Aldi, Tops, Price Chopper, or
BJ's. And if I have to look farther than that, it's definitely not
happening. Not for tostadas using leftover Thanksgiving turkey. I
don't want to buy special ingredients in order to use leftover
turkey.
To
be fair, I often come across recipes that look promising and I have
time to buy whatever I need for the recipe. My eyes will still glaze
over when I read
poblano
pepper
I
just don't want to put much thought or effort into buying—and
using—varieties of fresh chili peppers. I might change my mind
someday. I changed my mind about cilantro. Somehow I not only tried
it, and, although I didn't even like it, I hung in there with it
until it became one of my favorite herbs.
What
does this have to do with wheat?
Well,
when I read a recipe that calls for, say,
white
whole wheat flour,
my
eyes don't glaze over. White whole wheat—both soft and hard—which
I can grind into flour for maximum freshness and immediate use, is a
staple item in my kitchen.
But
your eyes may glaze over when you see anything but
flour
listed
as an ingredient in a recipe.
If
I lived in the Southwest, I could easily find many varieties of chili
peppers.
 |
| Anaheim Chili Peppers |
 |
| Poblano Chili Peppers |
Here
in Syracuse, New York, it isn't easy to have wheat of any kind on
hand, let alone grind it fresh for immediate use. But it can be done.
I think it is worth the effort. I'd like to help you do it. So come
back for Part 2.
Monday, November 19, 2012
What If There Are No More Twinkies?!
When Hostess Brands announced on Friday that it was going to liquidate, many people apparently became very concerned about their snack foods and emptied store shelves.
Today, at the behest of the judge, Hostess and the bakery union agreed to meet for mediation. I hope they will be able to resolve their differences so more than 18,000 people do not lose their jobs.
If mediation doesn't work out and you are concerned about the fate of Twinkies or another Hostess product, chances are it will live on under another company's care.
Personally, I don't care one way or the other. I've never been a big consumer of Hostess products--not even Twinkies! I've eaten plenty commercially produced snack foods. Oreos come to mind. One Oreo incident occurred when I was a college student. My friend and roommate Nancy D. and I once (or more) shared a package of double-stuffed Oreos while writing our papers: she ate the stuffing and I ate the cookie parts.
But more often I've made my own snack foods. There are advantages to this: they usually taste better; you know what is in them; they are less expensive; and (theoretically at least) you are more mindful of them. What I mean by that is, if you have to make it instead of just buy it and have it on hand, you are more likely to think about it before going to the bother of making it.
Over time I have developed better snack-eating habits. I have modified many recipes to be less unhealthy. I also try to make things in more appropriate amounts.
Here's an example. I love chocolate, so brownies are one of my favorite snack foods. Instead of baking a whole pan of brownies, if I am baking them for a snack, I quarter the recipe and bake it in four ramekins. When you figure that I cut my original recipe into 24 squares, each ramekin holds the equivalent of a brownie and a half. I share the three other servings or put them out of sight and out of mind.
This recipe is really easy and fast. It's based on my cocoa brownie recipe, because cocoa is less expensive than chocolate and has less fat and fewer calories. It still tastes very good. Too good.
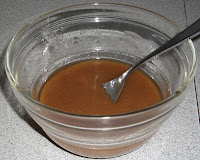
Start by melting 1/4 C butter in a bowl that holds at least 2 cups. I melt it in the microwave.

 In some recipes I substitute applesauce for half of the fat, but not in brownies.
Next, stir in 1/2 C brown sugar--1/4 C two times-- and 1/2 tsp. vanilla.

 Beat in an egg. If you want, you can use 2 egg whites instead of one egg, for less fat.

 By the way, I just use a table fork for stirring and beating in this recipe. It works just fine.
Now add 3/8 C flour--that's 1/4 C plus half of a 1/4 C. You can use white all-purpose flour, but my favorite is flour milled from soft white wheat. That adds nutrients, making this less unhealthy, and I prefer the flavor. Hard whole wheat flour works well, too, but the soft flour has a milder taste and softer texture. (Very soon I will write some posts about different flours and their availability.)
Also add 3 T unsweetened cocoa--that's three-quarters of a 1/4 C. I use Ghirardelli Unsweetened Cocoa. I've spoiled myself. I can't go back to Hershey's. I don't dare try Scharffen Berger.
Stir in a pinch of salt.

 Now divide the batter among 4 greased ramekins. Cooking spray works fine, but I prefer butter. If the butter is soft, it takes less than 1/2 tsp. to grease all 4 ramekins.
 "Bake" them in the microwave. I like mine dense, so I only cook them until they bubble and start to set, about 70 seconds in my microwave oven. If you like them cakey, add 1/4 tsp. baking powder with the other dry ingredients, and cook a little longer--but not too long or they will burn.
 I always prefer brownies to be completely cooled before eating.
I'm sure you can think of lots of variations, such as adding chopped nuts, topping with sprinkles (my grandkids' favorite), and, after they're baked, topping with ice cream.
Here is the original recipe:
Today, at the behest of the judge, Hostess and the bakery union agreed to meet for mediation. I hope they will be able to resolve their differences so more than 18,000 people do not lose their jobs.
If mediation doesn't work out and you are concerned about the fate of Twinkies or another Hostess product, chances are it will live on under another company's care.
Personally, I don't care one way or the other. I've never been a big consumer of Hostess products--not even Twinkies! I've eaten plenty commercially produced snack foods. Oreos come to mind. One Oreo incident occurred when I was a college student. My friend and roommate Nancy D. and I once (or more) shared a package of double-stuffed Oreos while writing our papers: she ate the stuffing and I ate the cookie parts.
But more often I've made my own snack foods. There are advantages to this: they usually taste better; you know what is in them; they are less expensive; and (theoretically at least) you are more mindful of them. What I mean by that is, if you have to make it instead of just buy it and have it on hand, you are more likely to think about it before going to the bother of making it.
Over time I have developed better snack-eating habits. I have modified many recipes to be less unhealthy. I also try to make things in more appropriate amounts.
Here's an example. I love chocolate, so brownies are one of my favorite snack foods. Instead of baking a whole pan of brownies, if I am baking them for a snack, I quarter the recipe and bake it in four ramekins. When you figure that I cut my original recipe into 24 squares, each ramekin holds the equivalent of a brownie and a half. I share the three other servings or put them out of sight and out of mind.
This recipe is really easy and fast. It's based on my cocoa brownie recipe, because cocoa is less expensive than chocolate and has less fat and fewer calories. It still tastes very good. Too good.
Start by melting 1/4 C butter in a bowl that holds at least 2 cups. I melt it in the microwave.


Next, stir in 1/2 C brown sugar--1/4 C two times-- and 1/2 tsp. vanilla.


Now add 3/8 C flour--that's 1/4 C plus half of a 1/4 C. You can use white all-purpose flour, but my favorite is flour milled from soft white wheat. That adds nutrients, making this less unhealthy, and I prefer the flavor. Hard whole wheat flour works well, too, but the soft flour has a milder taste and softer texture. (Very soon I will write some posts about different flours and their availability.)
Also add 3 T unsweetened cocoa--that's three-quarters of a 1/4 C. I use Ghirardelli Unsweetened Cocoa. I've spoiled myself. I can't go back to Hershey's. I don't dare try Scharffen Berger.
Stir in a pinch of salt.


I'm sure you can think of lots of variations, such as adding chopped nuts, topping with sprinkles (my grandkids' favorite), and, after they're baked, topping with ice cream.
Here is the original recipe:
Cocoa Brownies
1 C butter2 C brown sugar4 eggs2 tsp. vanilla1½ C flour (all-purpose originally; whole wheat works well; soft white whole wheat preferred)¾-⅞ C unsweetened cocoa (Ghirardelli)1 tsp. baking powder1 tsp. salt1 C chopped nuts (optional)
Beat together softened butter, brown sugar, eggs, and vanilla. Stir together flour, cocoa, baking powder, and salt, and then add them to the first mixture. Add nuts, if desired. Bake in a greased and floured 13”x9” pan at 350°F for 25-30 minutes.
After cooled, cut into 24 squares.
Monday, November 12, 2012
As Easy as (Pizza) Pie!
My daughter Kirsten and her family are here from California for a few weeks. So the extended-family get-togethers have begun!
Tonight we made pizza for the masses. Everybody contributed various food items. I made the pizza dough.
For anyone who bakes pizza at home, I recommend making your own dough for the crust. It's easy to make and it tastes good.
For anyone who wants to learn how to bake yeast breads, I recommend starting with pizza dough. It's easy to make and not at all fussy.
The fanciest pizza we had tonight was topped with fresh garlic, tomatoes, spinach leaves, feta cheese, and mozzarella cheese.

The others--eight in all--were delicious, too. Here are pictures of some of them.


I'm good--not great--at making pizza. But, for a better crust, I do recommend baking it on a pizza stone or ceramic tiles in your oven at a very high temperature, 450-475 degrees.
Here is what my well-used pizza stone looked like:

I use the past tense because this is what happened one day not too long ago:
 They don't last forever. I'm going to try tiles next.
If you have any leftover pizza--we had two leftover slices tonight--eat it for lunch the next day! (Or breakfast ... )
Tonight we made pizza for the masses. Everybody contributed various food items. I made the pizza dough.
For anyone who bakes pizza at home, I recommend making your own dough for the crust. It's easy to make and it tastes good.
For anyone who wants to learn how to bake yeast breads, I recommend starting with pizza dough. It's easy to make and not at all fussy.
Pizza DoughPour 1½ C warm water into large bowl.Add:1 T yeastAdd and mix:2 C flour*2 tsp. olive oil1 tsp. saltContinue to add flour—about 2 C more in all—until dough can be kneaded; then knead for 10 minutes.Put 1 tsp. olive oil in the bowl. Turn the ball of dough in it until it is covered with oil. Cover the dough and let rise in a warm place for at least 1 hour, or until doubled in bulk.
After the dough has risen, punch it down, but do not knead it. For thicker crust, divide the dough into 2 parts. For thinner crust, divide the dough into 4 parts.
*You can use all-purpose flour, bread flour, or whole-wheat flour. My current favorite is white whole-wheat flour. If you are using white flour, I recommend using bread flour if you can.
NOTE: This dough is not fussy. You could make it and put it in the refrigerator to take longer to rise (up to several hours). Or, if it rises and you aren't ready for it, punch it down and let it rise some more. As long as you don't knead it any more, it will be ready when you are. If you knead it some more, just let it rest 15 minutes before rolling it out.

The others--eight in all--were delicious, too. Here are pictures of some of them.


I'm good--not great--at making pizza. But, for a better crust, I do recommend baking it on a pizza stone or ceramic tiles in your oven at a very high temperature, 450-475 degrees.
Here is what my well-used pizza stone looked like:

I use the past tense because this is what happened one day not too long ago:

If you have any leftover pizza--we had two leftover slices tonight--eat it for lunch the next day! (Or breakfast ... )
Thursday, November 8, 2012

Tuesday, November 6, 2012
Eating Healthy Food Doesn't Have to be Expensive
Often I hear and read comments like these:
I would like to offer a few random examples of inexpensive, healthy, and (very important) delicious foods. They may require a little extra time. But often that just requires a little planning ahead.
Bake fresh whole-wheat bread for less than $1 for a 1 pound loaf. It tastes better than anything you can buy in the grocery store, it is more nutritious, and it is satisfying. Freeze whatever you can't use right away. When you thaw it out, it will be as good as fresh. Well, almost. Yes, it requires some up-front costs, like a grain mill and grain. But those are obstacles that can be overcome. (I'll address them in a future post.)
Last week I made Split Pea Soup. Delicious, nutritious, and very inexpensive. I made about a gallon of soup for less than $5. That's 16 cups of soup. That's 31 cents per cup:
Speaking of breakfast, a bowl of oatmeal costs a lot less than a bowl of any cereal from a box. And it's more nutritious and more filling.
As I said, these are just random examples, but I don't believe you have to choose between eating cheap and eating healthy. You do need to be judicious in your choices, and you need to be willing to cook more from scratch and use fewer prepared foods. But some people--like me--think that's a better way to eat anyway!
What are your inexpensive healthy food choices?
A bag of Cheetos is cheaper than a bag of apples; unhealthy processed foods are more prevalent (and less expensive) than whole foodsI hear people use these as excuses for choosing the less-healthy foods to fill up on.
I would like to offer a few random examples of inexpensive, healthy, and (very important) delicious foods. They may require a little extra time. But often that just requires a little planning ahead.
Bake fresh whole-wheat bread for less than $1 for a 1 pound loaf. It tastes better than anything you can buy in the grocery store, it is more nutritious, and it is satisfying. Freeze whatever you can't use right away. When you thaw it out, it will be as good as fresh. Well, almost. Yes, it requires some up-front costs, like a grain mill and grain. But those are obstacles that can be overcome. (I'll address them in a future post.)
Last week I made Split Pea Soup. Delicious, nutritious, and very inexpensive. I made about a gallon of soup for less than $5. That's 16 cups of soup. That's 31 cents per cup:
$2 for 2 lb. split peas, 38 cents for 2 oz. of ham, and I'm being generous when I figure about $2.50 for a few ribs of celery, a couple of carrots, an onion, 2 cloves of garlic, a couple of teaspoons of thyme, a little freshly-ground pepper, and a little salt. I happened to have a quart of home made chicken broth in the freezer, so I used it in place of some of the water.When my kids were little, I was a stay-at-home-mom, and I always tried to start the day with a hearty breakfast--things like pancakes, French toast, scrambled eggs and toast. Add a glass of milk and seasonal fruit (apple slices, orange slices) or canned fruit (those were the days of home made applesauce and home canned peaches!) and it's a pretty inexpensive meal. Breakfast doesn't have to be eaten in the morning either. It can make a quick, inexpensive supper.
Speaking of breakfast, a bowl of oatmeal costs a lot less than a bowl of any cereal from a box. And it's more nutritious and more filling.
As I said, these are just random examples, but I don't believe you have to choose between eating cheap and eating healthy. You do need to be judicious in your choices, and you need to be willing to cook more from scratch and use fewer prepared foods. But some people--like me--think that's a better way to eat anyway!
What are your inexpensive healthy food choices?
Monday, November 5, 2012
I Love the Smell of Baking Bread
I think I'm addicted to the smell of baking bread. This is what's in my oven right now:

I'm not even sure what I'm going to do with this bread. I'm baking it to practice making sourdough whole-wheat bread. Much as I'd love to, I can't eat all of this bread. So most of it will go in the freezer. Let me know if you would like to try some! My first batch came out great. This batch looks and smells even better.
I love having my house smell like bread--or rolls--and I like tasting it and having a limited amount for daily use. What I need is to have someone come by when I bake and whisk away all the rest of the bread. And I can still savor the lingering smell of baking bread.
Cracked Wheat Rolls
I almost forgot to take a picture of these rolls before I ate them!

Cracked Wheat Rolls take me back to my Aunt Betty's kitchen, where these were a regular part of dinner.

This is my Aunt Betty's recipe. It is based on her regular dinner roll recipe, which you can find here.
If you can, plan to serve dinner about 15 minutes after these rolls come out of the oven. That is when they are at their best. Thankfully, they remain awesome even after they cool.
Here is the recipe:
Cracked Wheat Rolls
2 C boiling waterIn the mixing bowl, pour the 2 C boiling water over the cracked wheat and stir them together. Let stand a few minutes and then add the 1 C cold water. Add the oil and molasses. Mix together the 3 C flour with the yeast, sugar, potato flakes, dry milk, and salt. Add them and the eggs to the cracked wheat mixture. Beat with mixer until smooth. Kneading by hand or with dough hook, add enough flour to make soft dough (5-6 C). In oiled bowl, let rise once or twice. Shape into rolls and place in greased pans; let rise. Bake at 350°F until brown, about 20 minutes.
2 C cracked wheat
1 C cold water
½ C canola oil
1/3 C molasses
3 C unbleached all-purpose flour
2 T yeast
1 C sugar
½ C instant potato flakes
1 C instant nonfat dry milk
1 T salt
3 eggs
5-6 C unbleached all-purpose flour
Thursday, November 1, 2012
Start Over!
I finally baked bread using natural fermentation! I first started this process about a month ago. A few days in, my first starter attempt lost all of its ability to expand, but I kept stirring and aerating it, hoping something would happen. I had hope because it had an interesting, fruity smell and it was not showing signs of mold.
But finally I did start over. My second attempt was doing really well, until I moved it temporarily to a spot out of sight--and forgot about it! Sadly, it had to join the compost.
My third attempt worked well. Here is the result:


It doesn't look appreciably different from regular whole-wheat bread. But the texture is slightly stretchy and the taste is lightly tangy--a nice, light sourdough. Very delicious!
Instead of giving you the recipe, I will refer you to the book. There's a lot to it. I feel like I'm at the beginning of an adventure. A bread adventure!
Here is my mother starter, all refreshed and ready to tuck into the refrigerator.

This is what makes the adventure possible!
Subscribe to:
Posts (Atom)